


Upcycled Frame Holiday Wreath
Transforming an empty thrifted frame into a delightful holiday wreath is a wonderful way to bring some seasonal cheer into your home. This project not only gives a new life to an old frame but also makes for a charming and unique decorative piece for your holiday celebrations. It’s a simple yet creative way to incorporate greenery and a personal touch into your decor.
Using just a few easy-to-find materials, you can create an alternative holiday wreath that adds a warm, inviting feel to any space. Let’s dive into why this project is perfect for the season.
Why You’ll Love This Project
- Affordable Materials: The main components can often be found at thrift stores or around your home, making this a budget-friendly DIY.
- Beginner-Friendly Process: This project is straightforward, making it accessible for crafters of all skill levels.
- Useful Upcycling: Giving a frame a second life is not only eco-friendly, but it also allows for creative expression.
- Customizable Finish: You can choose colors and styles that fit your personal decor or seasonal themes, making it truly yours.
- Attractive Display Possibilities: An upcycled frame wreath can hang on a door, wall, or be used as part of a seasonal vignette on a table or shelf.

Materials and Supplies
- Empty thrifted frame
- Paint (color of your choice)
- Removable greenery (like faux plants or seasonal foliage)
- Ribbon (seasonal or your choice)
- Floral wire
A few notes on materials: When choosing a frame, opt for one that has a flat surface for ease of decorating. If you’re unsure about paint colors, consider shades that complement your home decor or that reflect the holiday season’s palette, like deep reds and greens for Christmas.
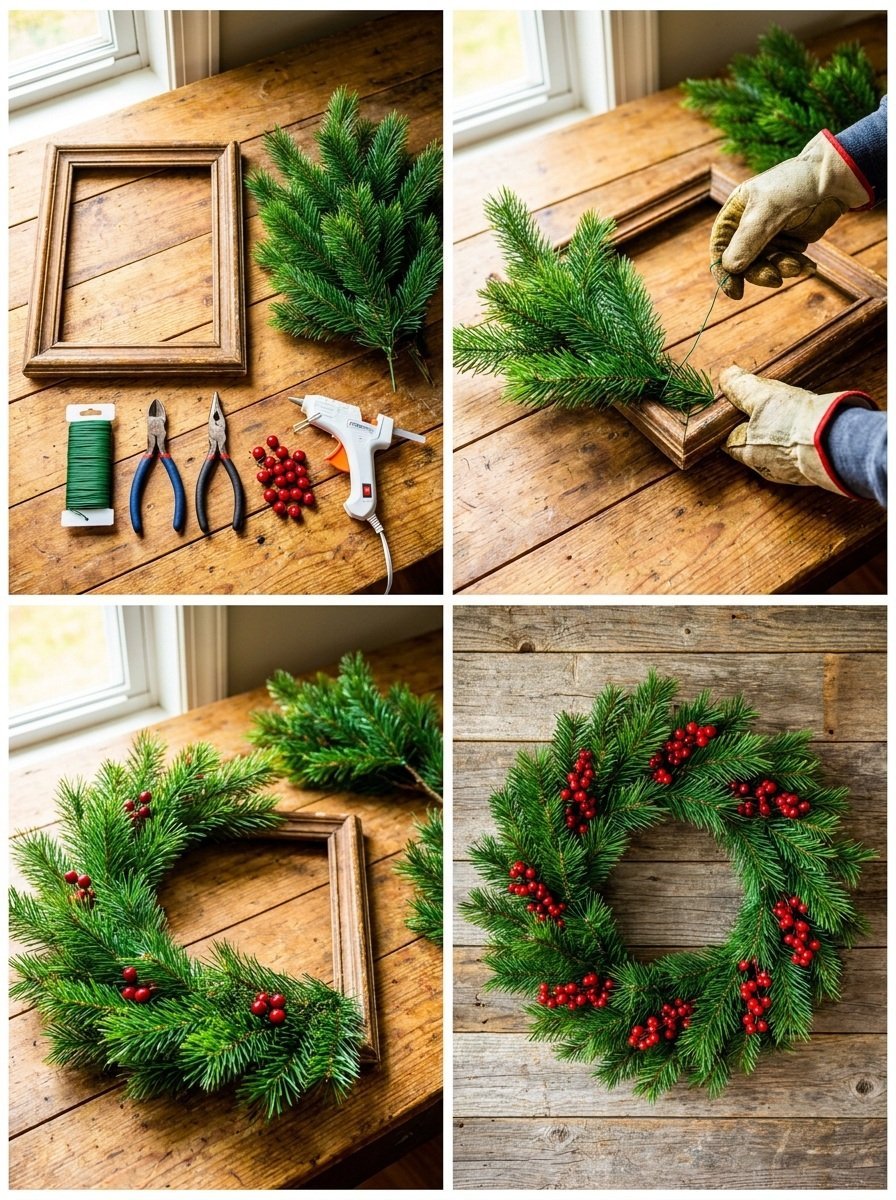
How to Make Upcycled Frame Holiday Wreath
Step 1: Clean and Paint the Frame
Start by cleaning your thrifted frame to remove any dust or residue. Once it’s clean, paint the frame in your chosen color. Allow the paint to dry completely, following the manufacturer’s instructions.
Step 2: Create a Greenery Bundle
While the paint dries, gather your removable greenery. Create a small bundle that you can attach to one corner of the frame. This could include faux branches, flowers, or even pine to bring in that holiday spirit.
Step 3: Secure the Greenery
Using floral wire, secure the greenery bundle to the frame at your chosen corner. Make sure it’s firmly in place but still adjustable in case you want to reposition it later.
Step 4: Add a Ribbon
Cut a length of ribbon to your desired length and attach it to the top of the frame, making a loop for hanging. You can always adjust the length based on where you plan to display your wreath.
Step 5: Hang the Frame
Your upcycled frame is now ready to be hung! Choose a spot that needs a little festive cheer, such as a door, wall, or even as part of a holiday display.
Tips for a Cleaner, More Polished Finish
- Ensure that the frame surface is smooth before painting to avoid uneven spots.
- Apply paint in even strokes for a uniform look, and let each layer dry before adding more.
- When securing the greenery, ensure it’s balanced and not top-heavy.
- Clean any excess floral wire that might be visible for a neater appearance.
- Use a complementary color or pattern for the ribbon to enhance your overall design.
Ways to Customize It
- Color Palette: Experiment with different colors based on your home’s decor or the holiday theme you are embracing.
- Decorative Details: Add additional embellishments like ornaments or small decorative items tailored to the season.
- Size Variation: Choose a larger or smaller frame to adjust the scale of your wreath.
- Seasonal Styling: Change the greenery and ribbon for each season or holiday to keep your decor fresh.
How to Style and Display It
The upcycled frame wreath can be displayed in several charming ways. Hang it on the front door to greet visitors or place it on a mantel for a cozy look. It also works well on a console table, coffee table, or as part of a seasonal tablescape. When styling, keep in mind to vary the heights of objects around the wreath for visual interest and to group in odd numbers for balance.
Care and Storage
For this project, care and cleaning are simple. If it gets dusty, a light wipe with a cloth will suffice. For seasonal storage, you can wrap it gently in tissue paper and store it in a cool, dry place until it’s time to display it again.

Frequently Asked Questions
Can I use real greenery?
Yes, you can use real foliage, but it may require more care to keep it looking fresh throughout the season.
What type of paint works best?
Acrylic or chalk paint is generally best for wood frames, as they adhere well and are easy to apply.
How can I make it more festive?
Adding small ornaments or holiday-themed decorations can enhance the festivity of your wreath.
Is this project suitable for indoor and outdoor use?
If using real greenery, it’s best for indoor display. However, if using high-quality faux greenery and weather-resistant paint, it can work for outdoor spaces.
What if I want to change the decorations?
You can easily switch out the greenery and ribbon each season, making it a versatile piece of decor.
How do I hang it?
You can use a simple push pin for a lightweight wreath or a command hook for easy removal later.
Conclusion
Creating an upcycled frame holiday wreath not only adds a personal touch to your decor but can also be a fun and rewarding project. If you’re looking for more inspiration on similar projects, check out A Calendar of Upcycled Wreaths for further ideas and creative possibilities. Enjoy your crafting!
Print
Upcycled Frame Holiday Wreath
- Total Time: 15 minutes
- Makes: 1 wreath
Description
Transform an empty thrifted frame into a delightful holiday wreath that adds warmth and seasonal cheer to your home.
Materials
- Empty thrifted frame
- Paint (color of your choice)
- Removable greenery (like faux plants or seasonal foliage)
- Ribbon (seasonal or your choice)
- Floral wire
Instructions
- Clean and paint the frame. Allow paint to dry completely.
- Gather removable greenery to create a small bundle.
- Secure the greenery bundle to the frame using floral wire.
- Cut a length of ribbon and attach it for hanging.
- Hang the frame in your desired location.
Notes
Make sure the frame surface is smooth before painting for a more polished finish.