

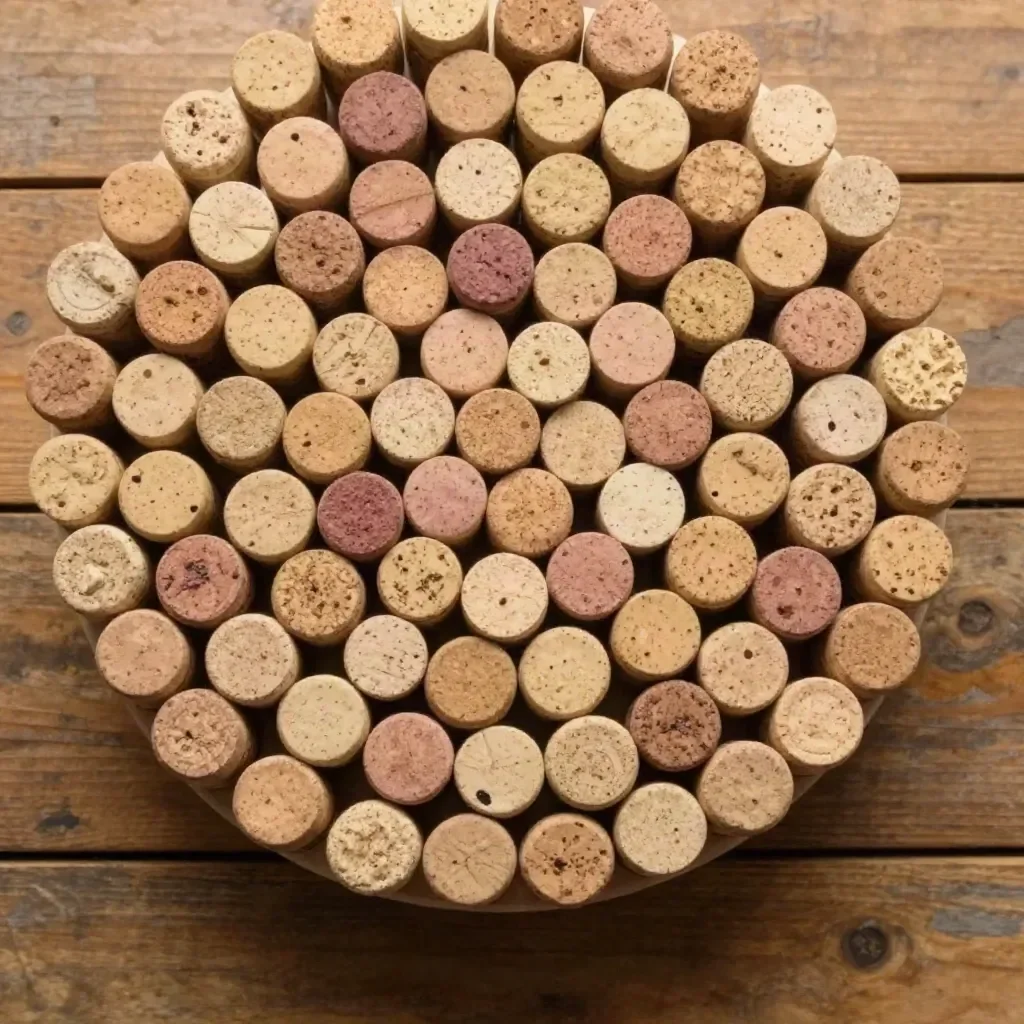
The Wine Cork Trivet DIY project is a delightful way to give new life to leftover wine corks while adding a unique and functional piece to your home decor. By arranging and securing these corks onto a sturdy base, you’ll create an attractive trivet that not only protects your surfaces but also serves as a conversation starter. This project is perfect for those who enjoy upcycling and working with simple materials.
Crafting a trivet from wine corks is rewarding it’s an easy process that requires minimal tools, making it accessible to beginners. Plus, the finished product fits seamlessly into various styles of decor, from rustic to modern, allowing it to enhance your kitchen or dining area beautifully.
Why You’ll Love This Project
- Affordable Materials: Utilizing leftover wine corks means you can create something beautiful without spending much.
- Beginner-Friendly Process: The steps required to make this trivet are straightforward and easy to follow.
- Useful Upcycling: This project helps divert materials from the landfill while creating a practical item.
- Customizable Finish: You can play with the arrangement of the corks to create a design that suits your personal style.
- Attractive Display Possibilities: The trivet can be displayed on any tabletop or counter, bringing a charming touch to your home.

Materials and Supplies
- Wine corks
- Sturdy cork or wood base
- Strong adhesive
- Craft knife (if needed)
A Few Notes on Materials
If you don’t have wine corks on hand, you can often find them at craft stores or online. You can also consider using alternative materials like wooden discs if you want a different aesthetic.
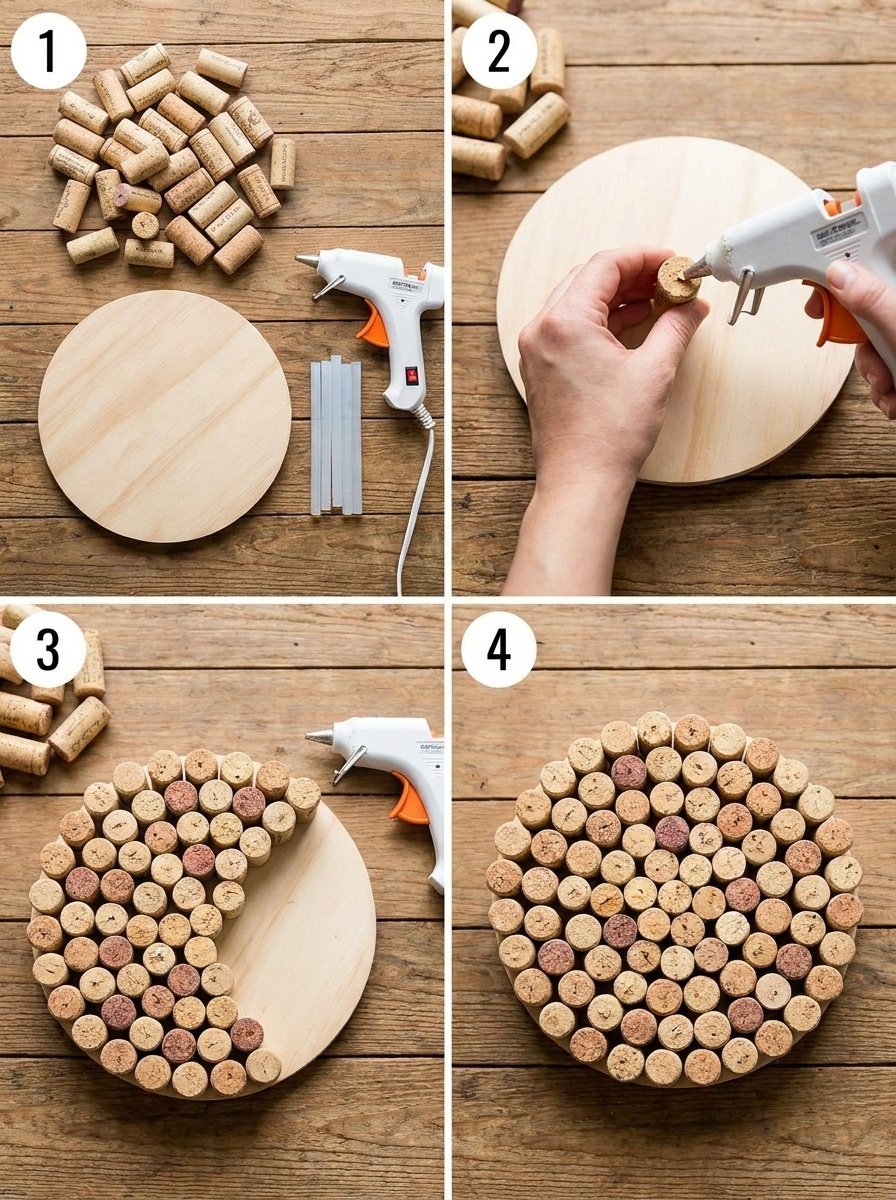
How to Make Wine Cork Trivet DIY
Step 1: Arrange the Corks
Begin by arranging the wine corks on your base before gluing. This step allows you to visualize the design and make adjustments as needed. Try different patterns until you find one that you love.
Step 2: Create a Pattern
Once you’re satisfied with the arrangement, create a simple repeating pattern with the corks. This will create a cohesive look for your trivet.
Step 3: Trim if Necessary
If any corks are too long or uneven, carefully trim them with a craft knife to ensure they fit snugly on the base. Always be cautious when using a knife, as safety is essential.
Step 4: Secure the Corks
Using your strong adhesive, carefully secure each cork in place on the base. Make sure the adhesive is applied evenly and adequately to hold the corks firmly.
Step 5: Let It Cure
Allow the adhesive to cure fully before using the trivet. Refer to the manufacturer’s instructions for specific curing times. Note that the heat resistance will depend on the materials used.
Tips for a Cleaner, More Polished Finish
- Even Glue Application: Apply glue evenly to avoid excess squeezing out from between the corks.
- Balanced Placement: When arranging corks, ensure that the weight is distributed evenly across the trivet to prevent wobbling.
- Trimming for Edge Cleanliness: If corks are trimmed, make sure to tidy up the edges for a uniform finish.
Ways to Customize It
- Color Palette: Consider staining the wood base or painting the corks for a pop of color.
- Finish: You might choose to seal the trivet with a clear finish for added durability.
- Decorative Details: Adding embellishments, like decorative rope or paint accents, can make your trivet stand out.
- Size Variation: Experiment with the size of the base; larger bases can accommodate more corks for a bold design.
How to Style and Display It
This cork trivet works beautifully on a dining table, serving as a functional piece that also adds visual interest. Position it beside your favorite kitchen items, or use it on a coffee table to support hot dishes during gatherings. When styling, consider mixing heights through books or potted plants nearby to create a layered effect.
Frequently Asked Questions
1. Can I use synthetic corks instead of natural ones?
Yes, synthetic corks can work, but they may not have the same aesthetic appeal.
2. How strong is the adhesive?
The strength of the adhesive will depend on the brand, so always check the manufacturer’s instructions for usage details.
3. What if I want to make a larger trivet?
You can easily increase the size by selecting a larger base and using more corks in your design.
4. How should I clean the trivet?
Wipe the trivet with a damp cloth. Avoid soaking it in water, as this can weaken the adhesive.
5. Is the trivet heat resistant?
The heat resistance will depend on the materials used; always test with moderate heat before placing hot items directly on it.For further inspiration and a detailed guide, check out this helpful resource.
Conclusion
Creating a Wine Cork Trivet is a satisfying project that not only beautifies your home but also makes great use of materials you might otherwise toss. It’s easy to personalize, and the steps are straightforward enough for anyone to follow. Whether you’re displaying it on your table or gifting it to a friend, this upcycled décor piece will surely be appreciated. Happy crafting!
Print
Wine Cork Trivet DIY
- Total Time: 15 minutes
- Makes: 1 trivet
Description
Create a charming and functional wine cork trivet using leftover corks, perfect for upcycling enthusiasts.
Materials
- Wine corks
- Sturdy cork or wood base
- Strong adhesive
- Craft knife (if needed)
Instructions
- Arrange the wine corks on your base before gluing to visualize the design.
- Create a simple repeating pattern with the corks for a cohesive look.
- Trim any uneven corks with a craft knife if necessary.
- Secure each cork in place using the strong adhesive, applying it evenly.
- Let the adhesive cure fully before using the trivet according to manufacturer instructions.
Notes
Use synthetic corks if natural ones are not available, but they may lack aesthetic appeal. To enhance durability, consider sealing the trivet.