


What Can You Make With Beads | Easy DIY Wind Chimes With Beads
Creating wind chimes can be a delightful and relaxing craft project that brings a beautiful touch to your home or garden. Not only do they add a decorative element, but they also produce soothing sounds when the wind blows through them. This DIY wind chime project using beads is simple and offers endless options for personalization, making it a fun activity for both beginners and experienced crafters alike. Plus, you can explore other bead projects like DIY melted bead suncatchers for even more creative fun!
Why You’ll Love This Project
- Creative Expression: This craft allows you to showcase your personal style by choosing bead colors and shapes.
- Sensory Enjoyment: The gentle sounds produced by the chimes create a relaxing atmosphere, perfect for outdoor spaces.
- Budget-Friendly: Using inexpensive materials makes it an affordable option to enhance your home decor.
- Quick and Easy: This project can be completed in just a few hours, making it perfect for a weekend activity.
- Ideal for All Ages: Encourages craft-making among family members, allowing everyone to participate.

You may also find How To Make Glue Suncatchers Easy Diy Window Decor useful.
Materials You’ll Need
- Beads (your choice of colors and sizes)
- String or wire (for hanging the beads)
- A sturdy hoop or frame (to structure your chime)
- Scissors
- Drill or sharp object (if needed, to create holes)
- Additional decorative items (optional, such as shells or bells)
How to Make Your Wind Chime
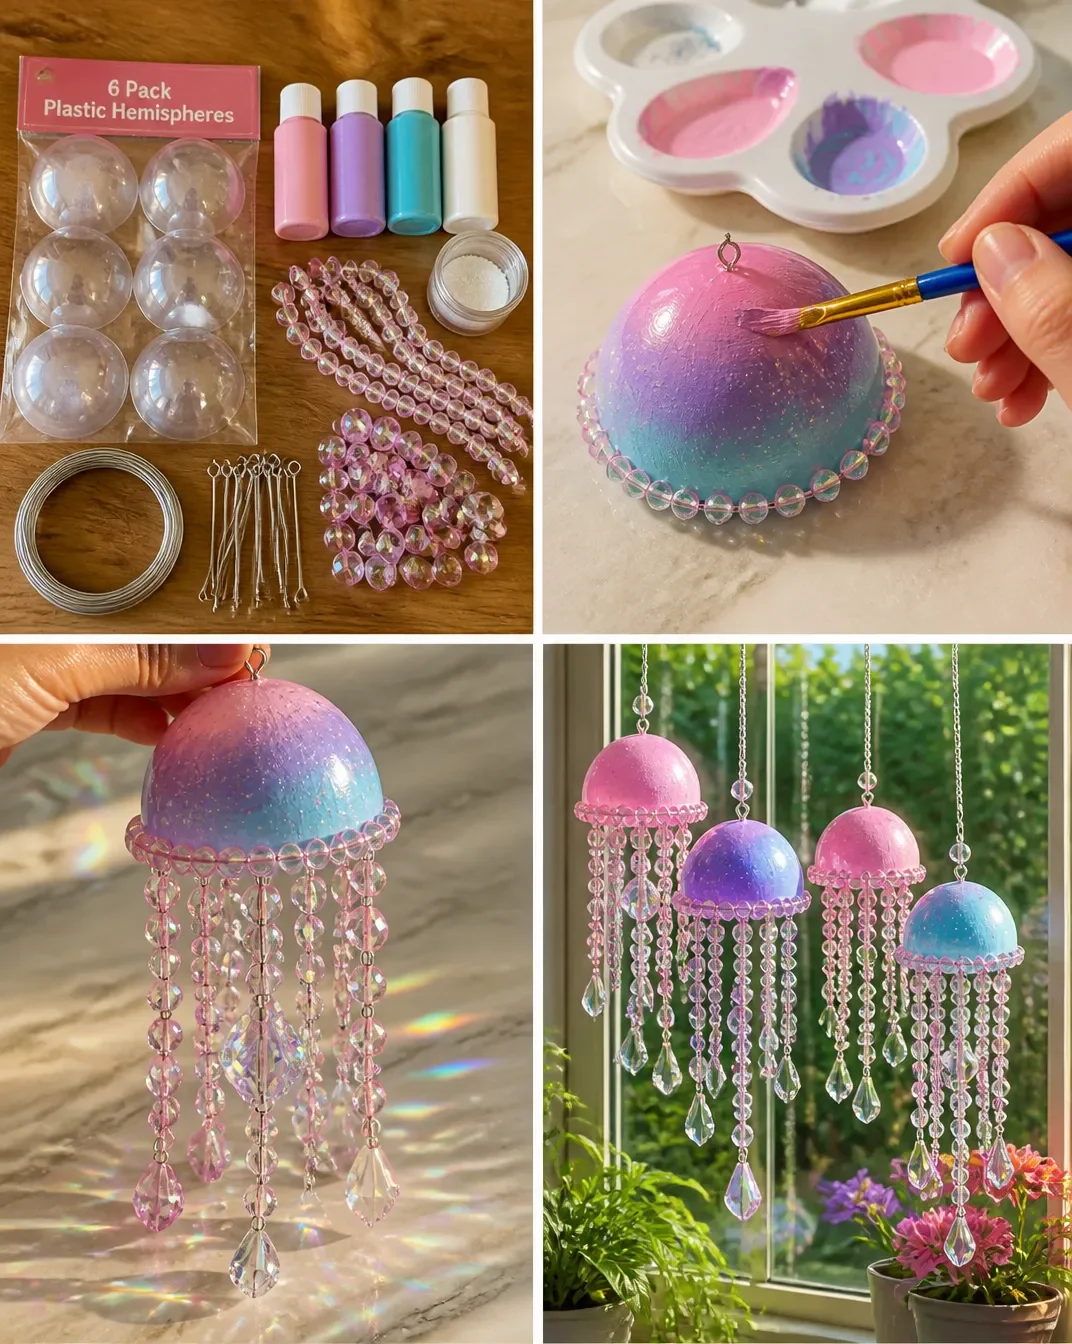
Prepare Your Materials: Gather all the necessary materials and decide on a beading pattern. This step will help you visualize your wind chime design. You may also find Diy Melted Bead Suncatchers Easy Craft Tutorial 2 useful.
Cut the String or Wire: Cut several lengths of string or wire to your desired length, ensuring they’re long enough to securely hold the beads along with enough excess to tie.
String the Beads: Begin threading beads onto each piece of string or wire. Mix different shapes and colors for a vibrant look.
Attach to the Hoop: Knot the strings securely to the hoop or frame. Space them evenly around the hoop to keep the chime balanced.
Create and Attach the Bottom: For added charm, you might want to create a small cluster of beads or attach a small bell to the bottom of the strings. This will generate a delightful sound in the wind.
Finish and Hang the Chime: Once everything is secure, make a larger loop at the top of the hoop for hanging. Find a suitable place outdoors where it can catch the wind.

Helpful Tips
- Mix Materials: Consider adding other lightweight decorative items, like shells or feathers, to create a more unique design.
- Secure Knots: Make sure to double knot your strings to prevent them from coming loose.
- Test Sounds: After hanging, gently sway the chime to hear the sound, and adjust as necessary.
Creative Variations
- Color Themes: Choose a seasonal color palette for your beads to celebrate different times of the year, such as pastels for spring or warm tones for fall.
- Themed Chimes: Consider using themed decorative items (like sea-themed charms) for beach-inspired wind chimes.
- Size Adjustments: Experiment with different sizes of hoops for varied wind chime lengths; larger hoops can add more strings and beads.
Making It With Kids
This project is a wonderful opportunity for kids to engage in crafting. Set clear boundaries around the tools used and provide adult supervision for any cutting or drilling activities. Allow kids to choose their bead patterns and colors, encouraging them to express their creativity.
How to Display, Use, or Gift It
Once completed, display your wind chime in a frequently visited outdoor area like a patio, balcony, or garden. These handmade chimes also make lovely gifts for friends or family, perfect for housewarming or personal occasions.
Frequently Asked Questions
1. Can I use any type of beads?
Yes, you can use various types of beads, but ensure they’re lightweight to avoid pulling down the strings.
2. How do I secure the chime for outdoor use?
Select a sturdy location and possibly add a weather-resistant finish to the wood or paint if used.
3. What if the chime doesn’t make sound easily?
Adjust the positioning of the beads or ensure they’re not too close to one another to allow for movement.
4. Can I make this project with a group?
Absolutely! This project is great for crafting parties and can be adapted for various skill levels.
Conclusion
Crafting your own wind chimes with beads is not only enjoyable but also adds a personal touch to your decor. If you’re looking for more ideas on bead crafts, check out this comprehensive guide on beaded DIY wind chimes. Enjoy your crafting journey!
Print
Easy DIY Wind Chimes With Beads
- Total Time: 15 minutes
- Makes: 1 wind chime
Description
Learn to create beautiful and personalized wind chimes using beads, adding a soothing touch to your home or garden.
Materials
- Beads (your choice of colors and sizes)
- String or wire (for hanging the beads)
- A sturdy hoop or frame (to structure your chime)
- Scissors
- Drill or sharp object (if needed, to create holes)
- Additional decorative items (optional, such as shells or bells)
Instructions
- Prepare your materials: Gather all the necessary materials and decide on a beading pattern.
- Cut the string or wire to your desired length, ensuring they’re long enough to securely hold the beads.
- String the beads onto each piece of string or wire.
- Attach the strings securely to the hoop or frame, spacing them evenly.
- Create a small cluster of beads or attach a small bell to the bottom for added charm.
- Finish by making a loop at the top of the hoop for hanging and find a suitable place outdoors.
Notes
Mix materials for a unique design and ensure to test the sounds after hanging.