

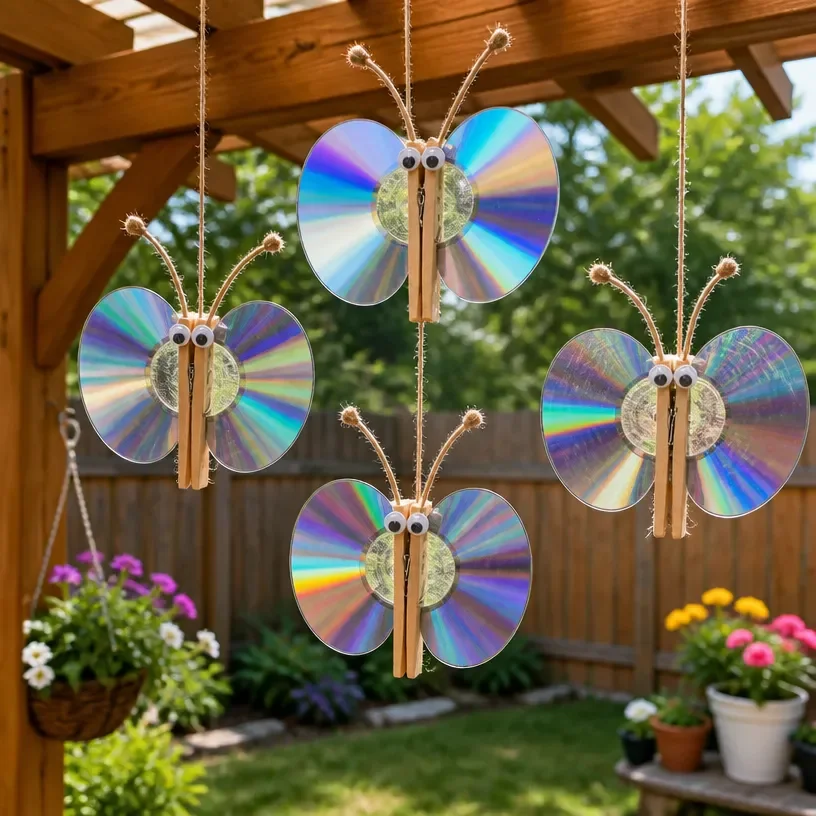
Upcycled CD Butterfly Crafts for Sparkling Garden Decor You may also find Diy Eco Friendly Upcycled Bottle Butterfly Suncatcher useful.
Creating charming garden decor doesn’t have to involve expensive materials. One delightful way to add a touch of color and whimsy to your outdoor space is by making upcycled CD butterfly crafts. These sparkling garden decorations are not only visually appealing but also a wonderful way to repurpose old CDs that may otherwise only gather dust. The reflective surface of the CDs mimics the shimmer of actual butterflies, making them a perfect addition to any garden. You may also find Diy Upcycled Clear Bottle Rainbow Butterfly Suncatcher useful.
In this tutorial, I will guide you through transforming unused CDs into eye-catching butterflies. This project combines creativity with sustainability, turning discarded items into beautiful, functional art. It’s a simple and enjoyable project that even beginners can tackle. You may also find Diy Butterfly Mobile Recycled Bottles useful.
Why You’ll Love This Project
- Affordable Materials: Using old CDs means you won’t need to spend much, if anything, on supplies.
- Beginner-Friendly Process: This craft is straightforward, making it great for DIY novices.
- Useful Upcycling: Repurposing CDs helps reduce waste and promotes eco-friendliness.
- Customizable Finish: You can choose your colors and embellishments, ensuring each butterfly is unique.
- Attractive Display Possibilities: Once completed, these butterflies make stunning decor items for your garden or home.
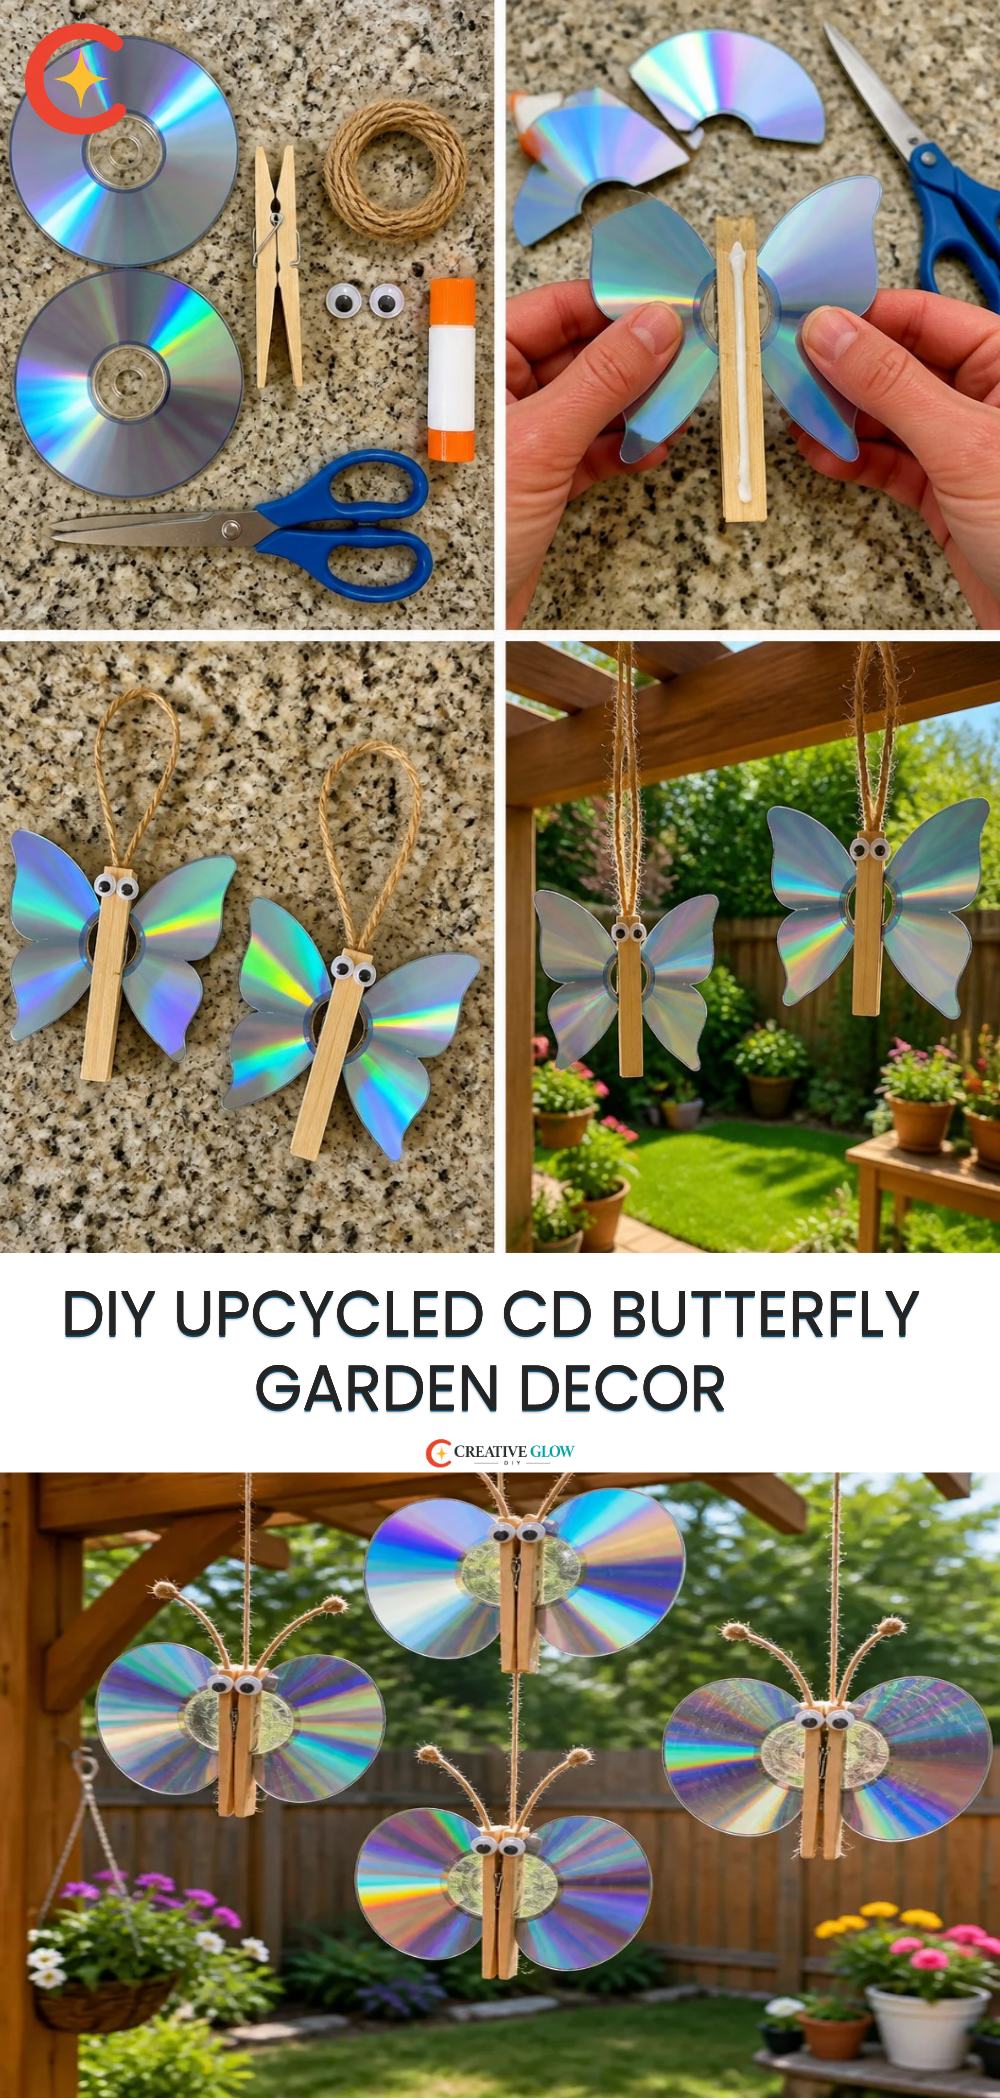
Materials and Supplies
- Old CDs (as many as you like)
- Acrylic paint or permanent markers
- Paintbrushes or sponges
- Strong adhesive or hot glue gun
- Wire or sticks for the body (you can even use twigs)
- Optional: decorative materials (e.g., beads, glitter)
A few notes on materials
When selecting paint, opt for vibrant colors that will pop against the reflective surface of the CDs. If you prefer a more natural look, consider using clear coat spray or a matte finish.
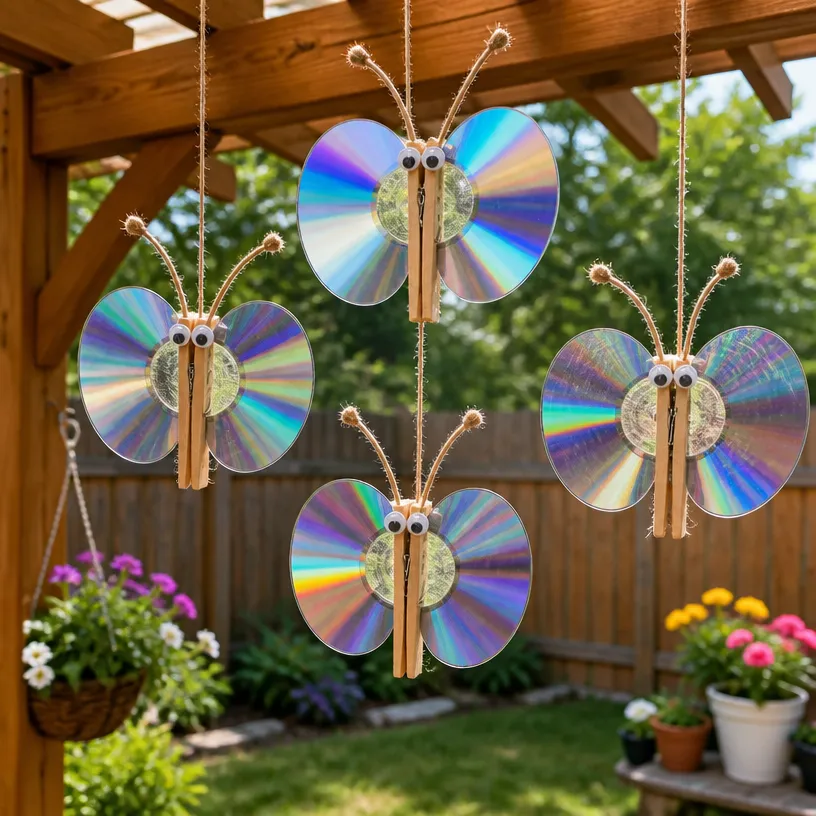
How to Make Upcycled CD Butterfly Crafts for Sparkling Garden Decor
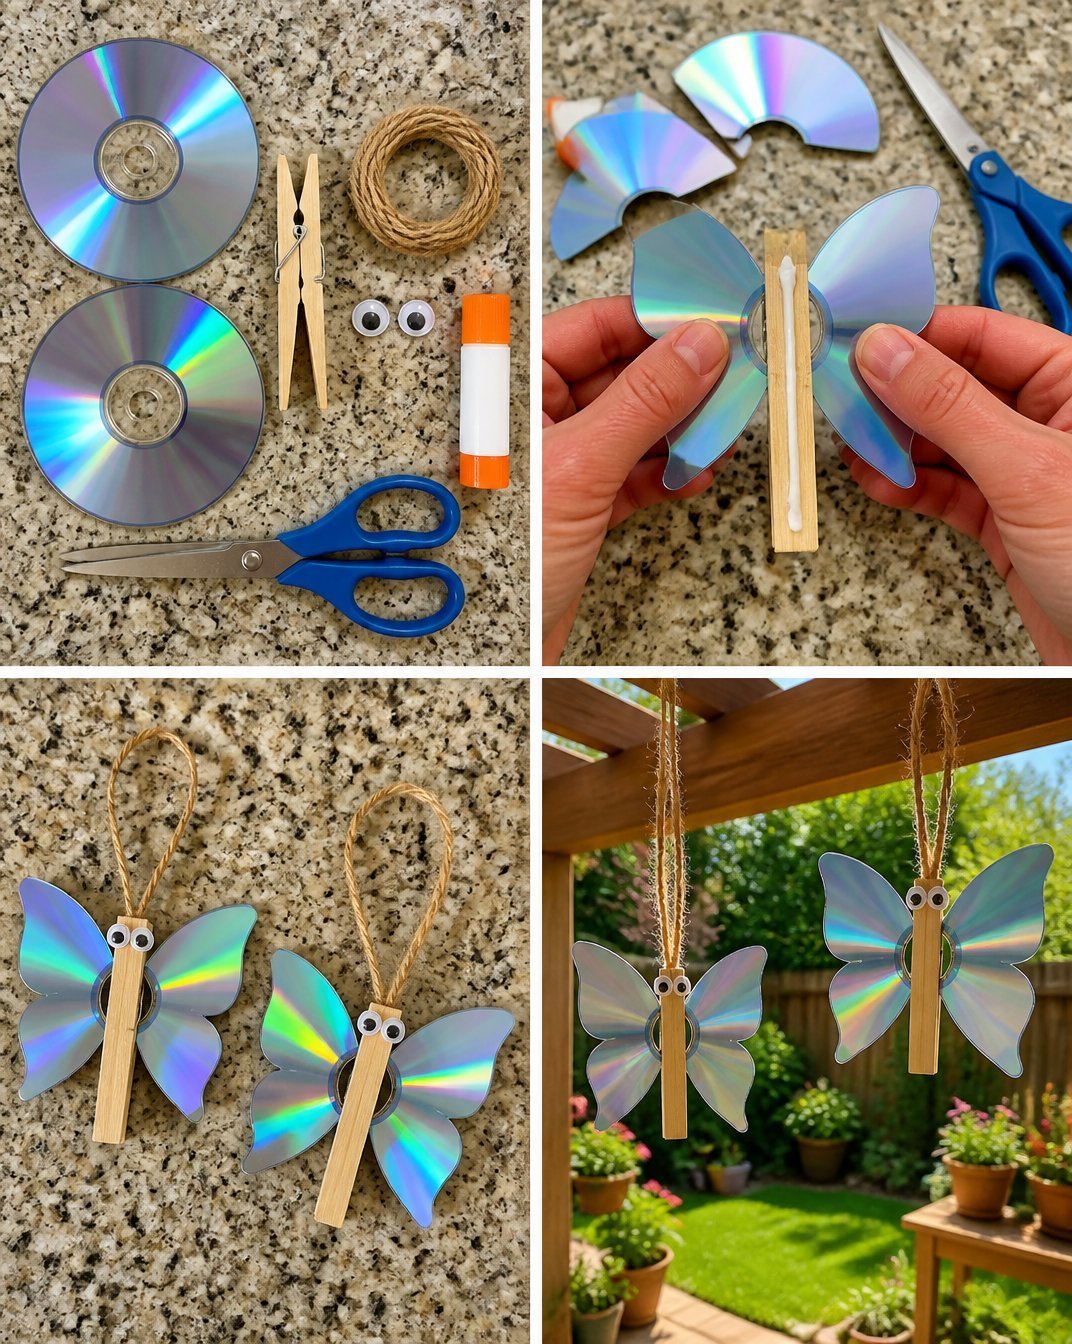
Step 1: Prepare Your Materials
Gather all your materials in a well-lit workspace. If you’re using multiple CDs, think about the designs you want to create. Each butterfly can differ in size and pattern.
Step 2: Design the Butterfly
Using acrylic paint or markers, begin painting your CDs. You can create intricate designs or keep it simple with solid colors. Allow some creativity to flow think about patterns like stripes, polka dots, or even floral designs. Let the paint dry completely.
Step 3: Create the Butterfly Body
For the butterfly’s body, you can use a stick or wire. If using a stick, cut it to your desired length. Attach the body to the center of the painted CD using strong adhesive or hot glue. Be sure the glue holds well to avoid losing any pieces.
Step 4: Assemble the Wings
Depending on your design, you may want to attach another CD behind the painted one, creating a layered effect. Use glue to secure the two CDs, ensuring they are positioned correctly to resemble butterfly wings.
Step 5: Add Any Decorative Elements
Feel free to embellish your butterfly by gluing on beads or adding glitter for extra sparkle. This aspect allows for a personal touch and can enhance the overall look.
Step 6: Display Your Beautiful Butterflies
Once your butterflies are complete and the glue is dry, they are ready to be displayed in your garden or home. You can hang them from trees, place them on stakes in flower beds, or even create a decorative mobile using several butterflies.
Tips for a Cleaner, More Polished Finish
- Use even strokes when applying paint to ensure a smooth finish.
- Avoid excess adhesive for cleaner edges and to avoid messy outcomes.
- Experiment with colors to find combinations that reflect your personal style or fit your garden theme.
- Allow ample drying time between steps, following the manufacturer’s guidelines for the adhesives or paints used.
Ways to Customize It
- Color Palette: Choose colors that match your garden or seasonal theme.
- Finish: Instead of paint, use washi tape or fabric for a different texture.
- Size Variations: Create butterflies in various sizes for visual interest.
- Themes: Create a collection of butterflies representing different seasons or holidays.
How to Style and Display It
These upcycled CD butterflies fit perfectly in various spots around your home and garden. Place them on a mantel, hang them in windows, or place them amongst your flower beds. To enhance your display, consider grouping them in odd numbers, varying their heights, and pairing them with other garden decor that complements their colors.
Frequently Asked Questions
Can I use any type of paint for this project?
Acrylic paint or permanent markers are best for this project as they adhere well to the CD surface and resist fading.
How can I prevent the paint from scratching off?
Allow the paint to cure fully and consider sealing it with a spray sealer designed for outdoor use.
What if I don’t have old CDs?
You might be able to find used CDs at thrift stores or consider asking friends and family if they have any lying around.
Can I use these butterflies indoors too?
Absolutely! These butterflies look charming in both indoor and outdoor spaces.
Conclusion
Upcycling old CDs into beautiful butterfly crafts is not just a fun project but an effective way to enhance your garden decor while promoting sustainability. If you’re looking for additional ideas on how to reuse materials creatively, you can explore more projects like those found on CD Recycling – Cards and Crafts. Enjoy creating your unique garden oasis with these sparkling embellishments!
Print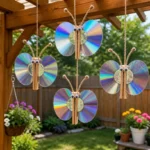
Upcycled CD Butterfly Crafts for Sparkling Garden Decor
- Total Time: 1 hour
- Makes: Multiple decorations
Description
Transform old CDs into beautiful butterfly decorations for your garden with this easy upcycling project.
Materials
- Old CDs (as many as you like)
- Acrylic paint or permanent markers
- Paintbrushes or sponges
- Strong adhesive or hot glue gun
- Wire or sticks for the body (twigs can also work)
- Optional: decorative materials (e.g., beads, glitter)
Instructions
- Prepare your materials in a well-lit workspace.
- Design the butterfly by painting CDs with acrylic paint or markers.
- Create the butterfly body using a stick or wire and attach it to the painted CD.
- Assemble the wings by gluing another CD behind the painted one.
- Add any decorative elements like beads or glitter.
- Display your completed butterflies in your garden or home.
Notes
Experiment with colors and sizes to create a collection of butterflies that match your garden theme.